Create Onboarding Templates & Self-Serve Hosted Onboarding Links (no-code)
Onboarding new merchants is a very simple process. This can be done either through the UI using our hosted/whitelabel onboarding flows, or through our Onboarding APIs and SDKs. Most of our low-code/no-code onboarding solutions leverage our "Onboarding Templates" to streamline the onboarding process for your merchants.
This guide focuses on teaching you how to create "onboarding templates" and share "hosted onboarding links" to allow you to begin onboarding your first merchants within minutes. All without having to build your own custom UI.
This guide will teach you how to:
- Create an onboarding template from our portal
- Retrieve the "hosted onboarding links" that you can share with your merchant prospects to collect their business information and their acceptance to the "Merchant Processing Agreement".
1. Create an onboarding template from our portal:
Creating an onboarding template is easy. Follow the steps below:
-
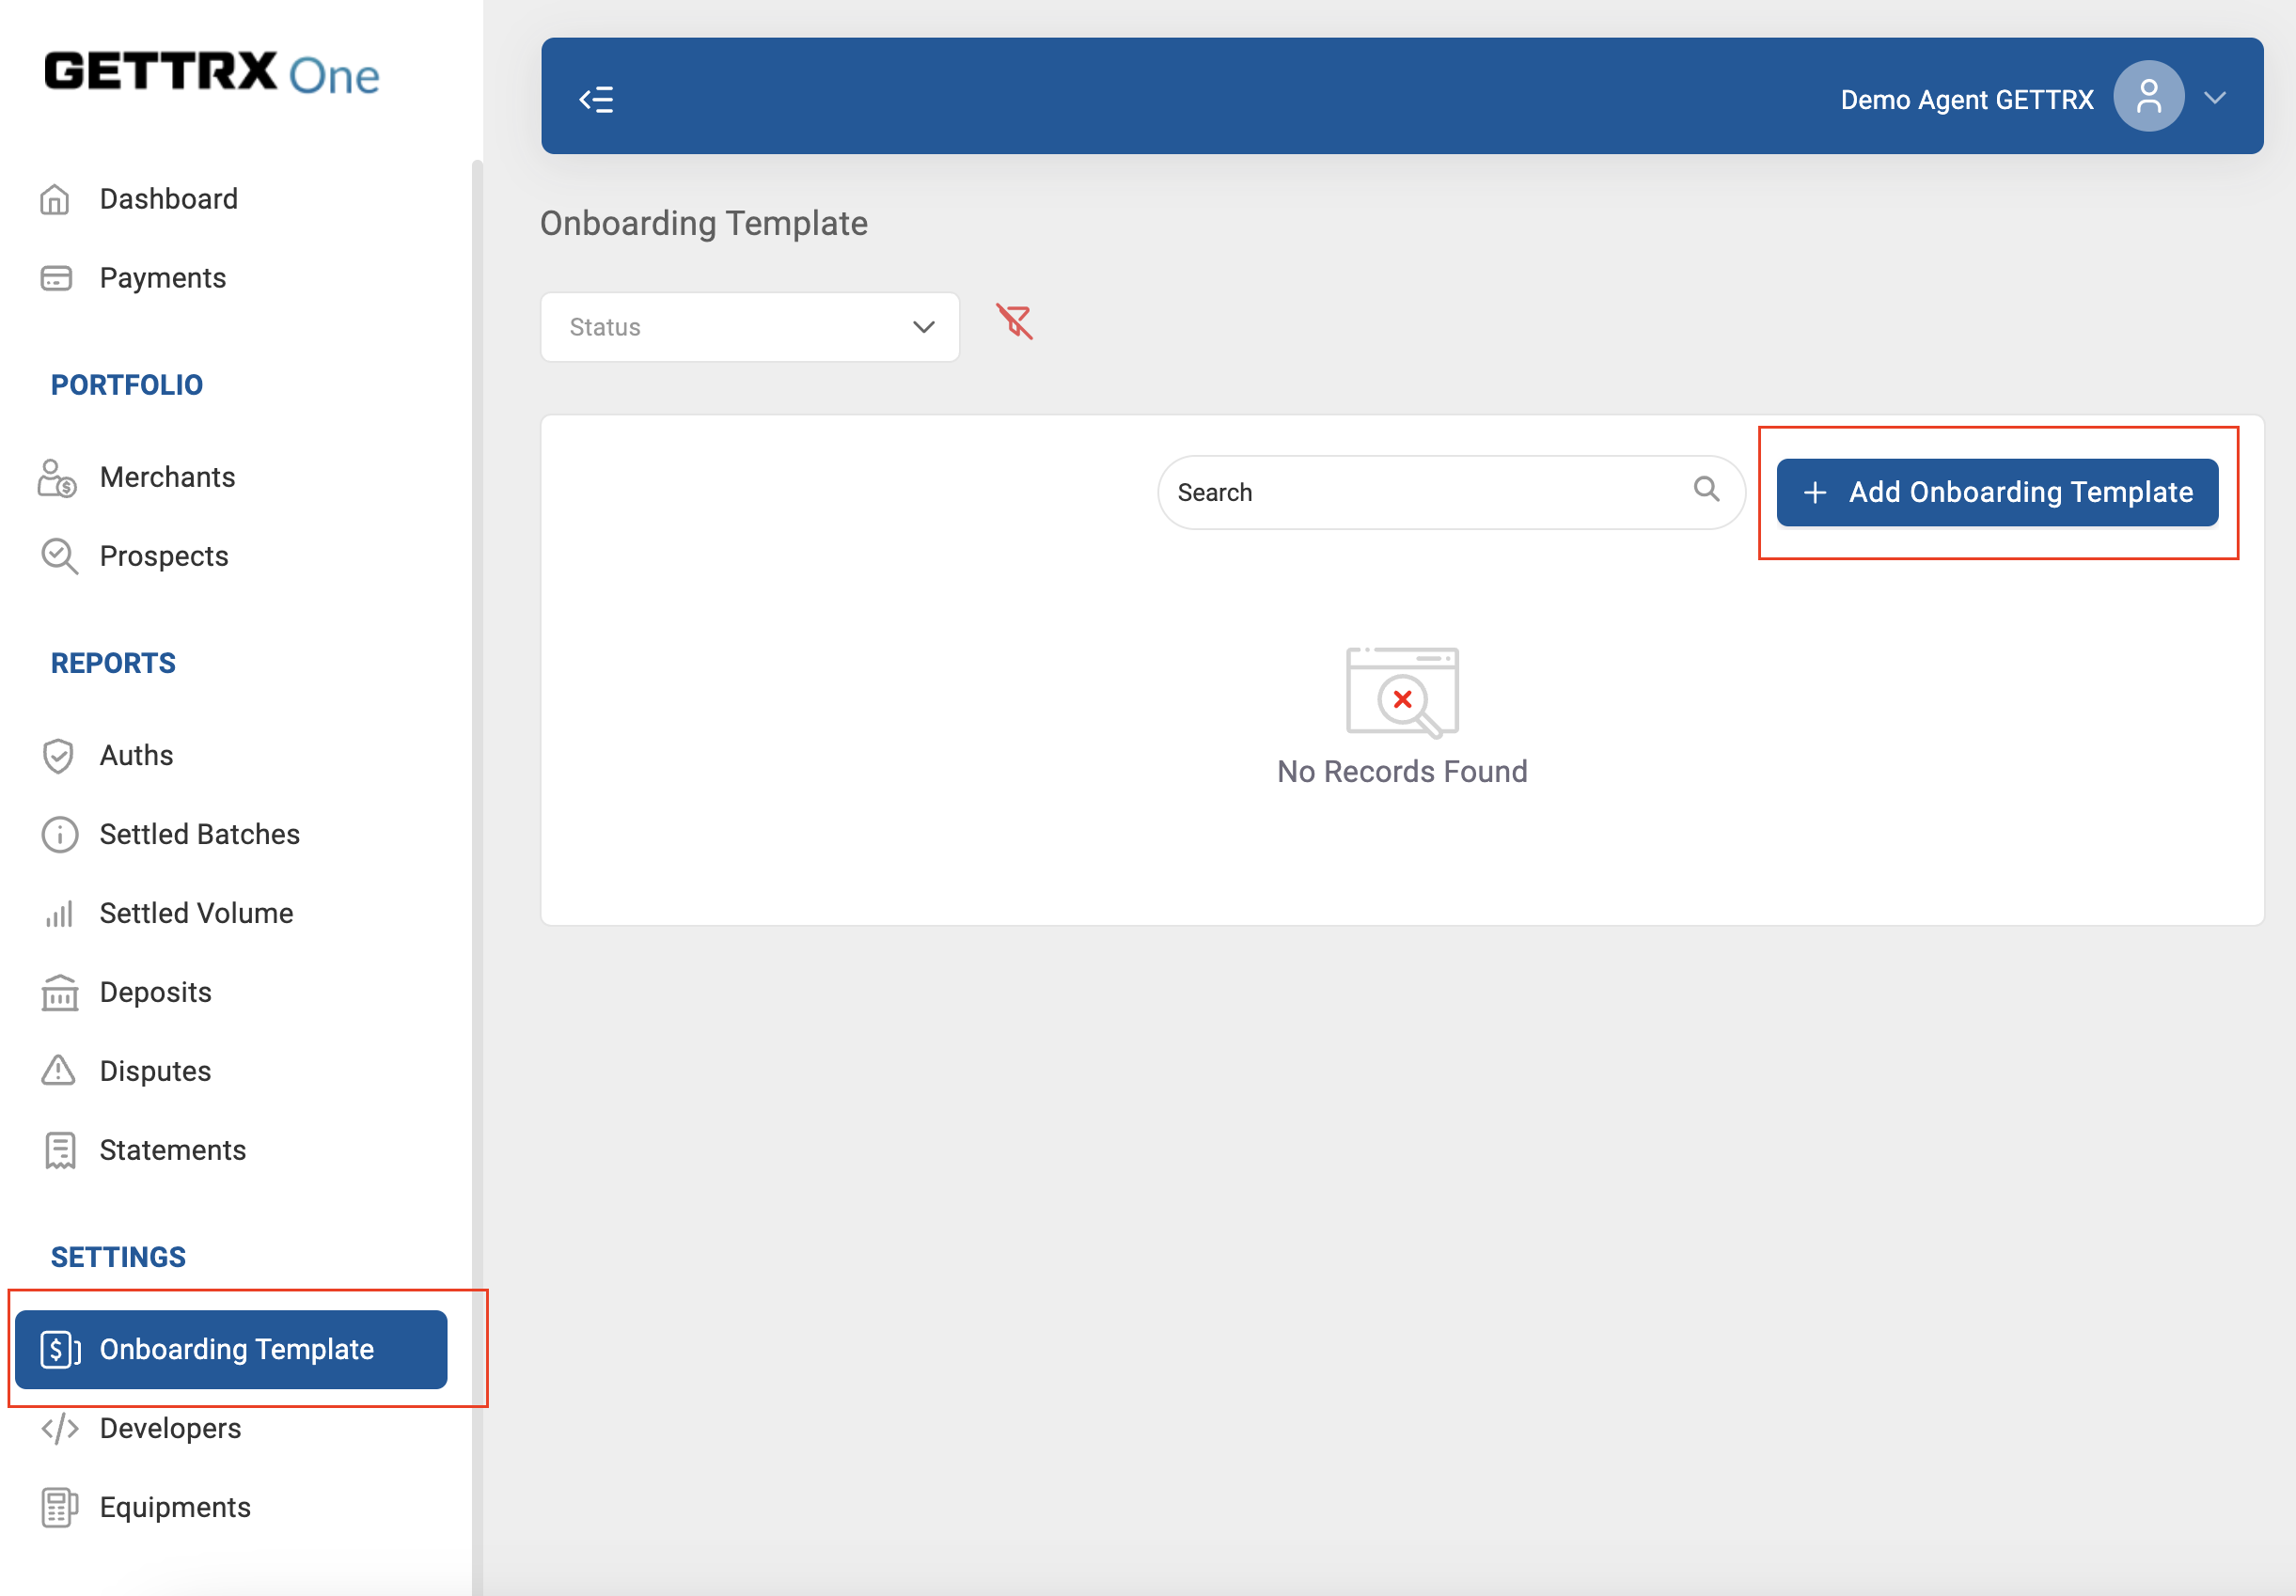
Login into our portal and go to "Settings" -> "Onboarding Templates" -> "Add Onboarding Template"
-
Fill out all the fields in the form to create a template

- Template Name: Name of the template
- Template Description: Brief description for you to easily recognize the template
- Agent: If you have access to manage multiple Agents, pick the agent that will be the owner of this template
- Auto Submit: Setting this value to "Yes" will automatically send the Merchant Application to underwriting as soon as it is "accepted" by the merchant and any required information is uploaded. Setting the value to "No" will hold the applications and allow you to review them for completeness and accuracy before manually submitting it to us for underwriting. We recommend you to initially set this value to "No" until you are comfortable with the application submission process. Note: Applications that have been accepted by the merchant and are ready for your review can be found under the "Prospects" tab with the status "Signed".
-
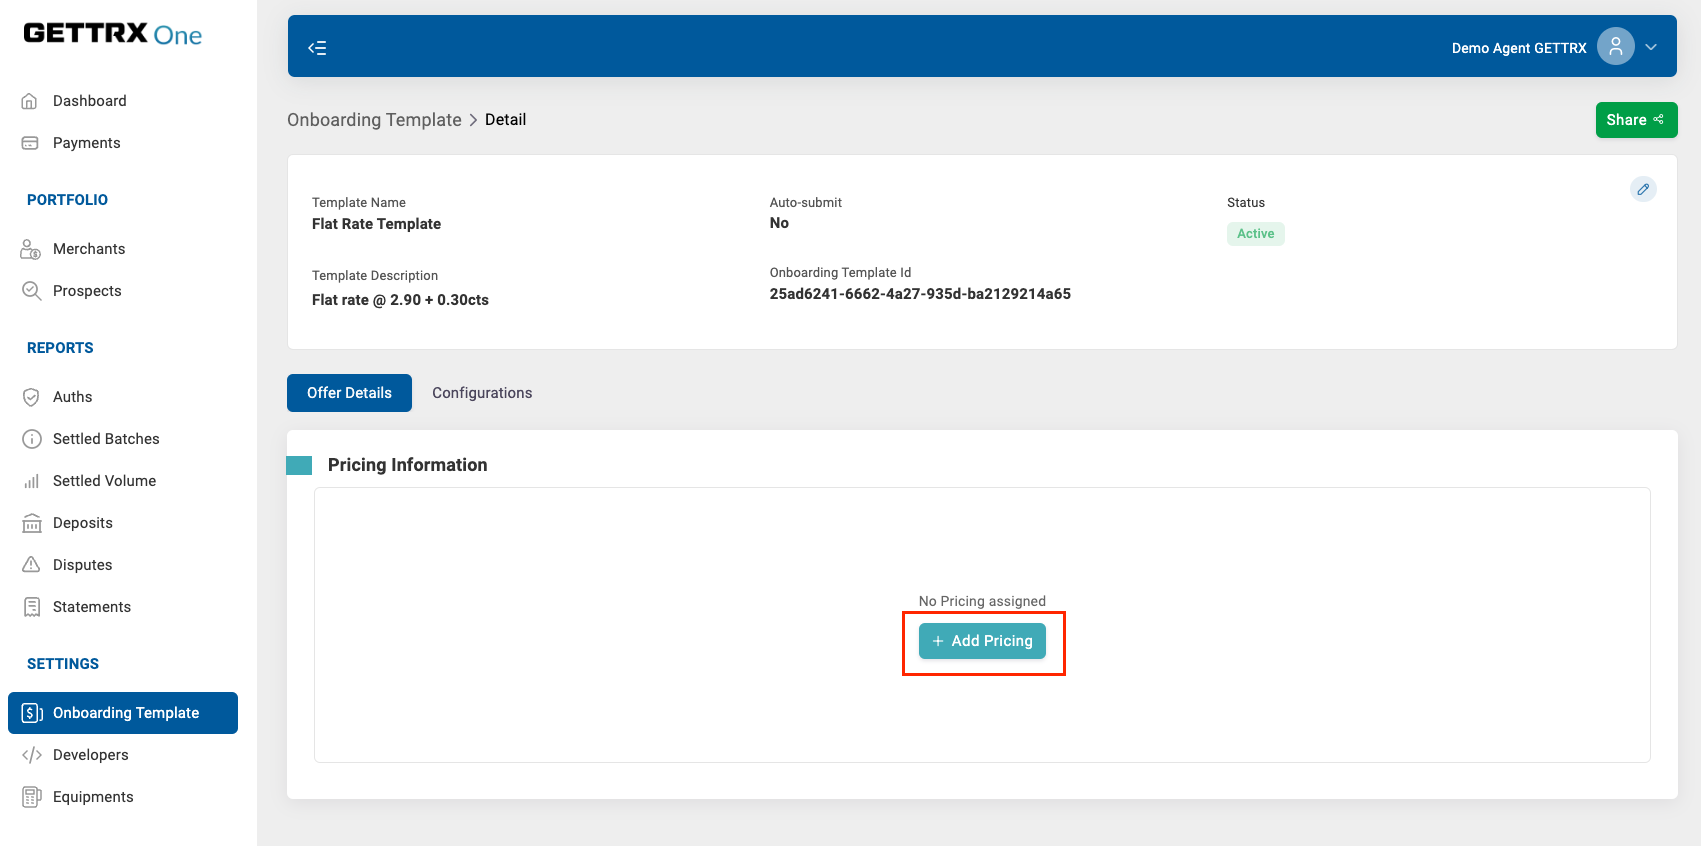
Add pricing to your Onboarding Template
-
After creating the template, under the "Offer Details" tab, click on "Add pricing"
-
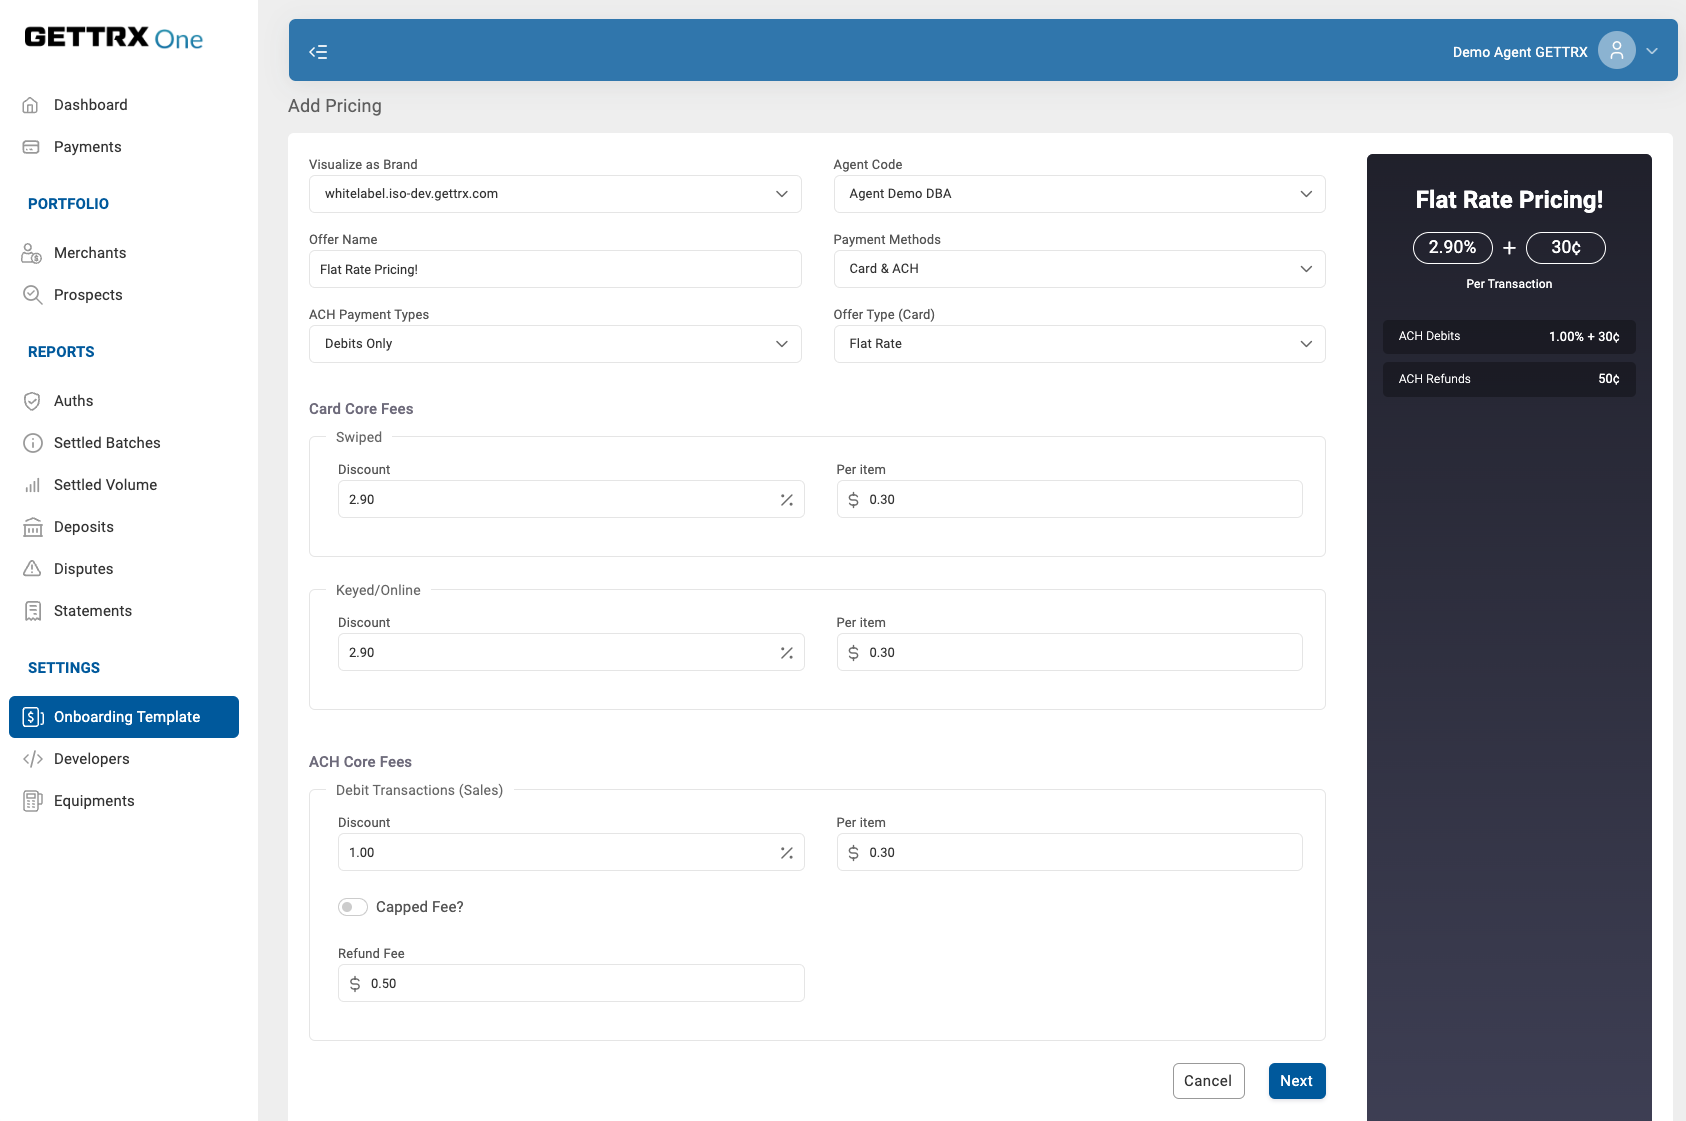
Then follow the steps on our visual Pricing Offer Builder to configure the desired pricing for your onboarding template. Our UI builder will allow you to:
-
Select the preferred branding (available for white-labeled portals) & Agent Code
-
Select the payment method types that the merchants signing up through this onboarding template will be enabled for (i.e. Credit Cards, ACH)
-
Add the pricing for the merchant
-
-
Once you are done adding your pricing, save it.
-
-
(Optional) Configure your hosted onboarding flow to preselect responses and/or remove questions that you may already know the answer for.
This feature can help you streamline your onboarding flow. Please refer to our "Customize Your Hosted Onboarding Flows" guide for more details on how to customize your Onboarding Template's questions and streamline your merchant's onboarding flow.
2. Retrieve the "hosted onboarding links" that you can share with your merchants/prospects to collect their business information and their acceptance to the "Merchant Processing Agreement":
- Retrieve the "hosted onboarding links" that you can share with your merchants/prospect to collect their merchant information and their acceptance to the "Merchant Processing Agreement".
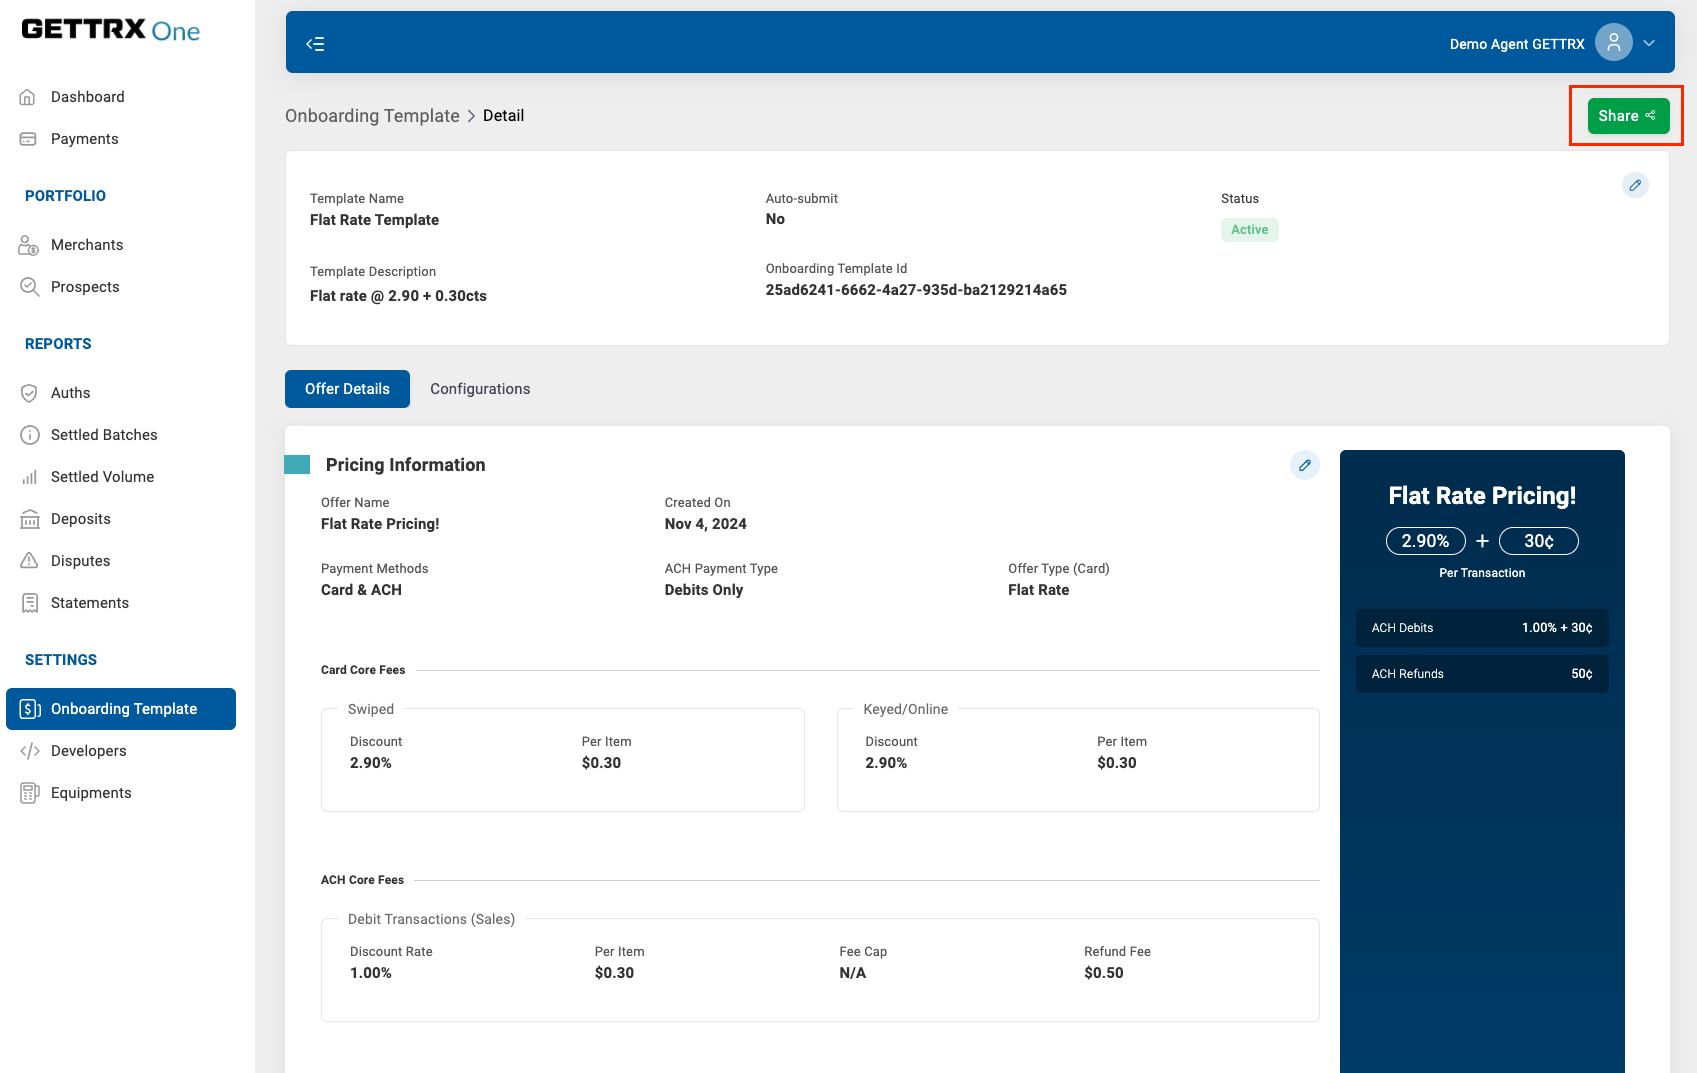
Share your Onboarding Template:
-
-
Click on the "Share" Button
-
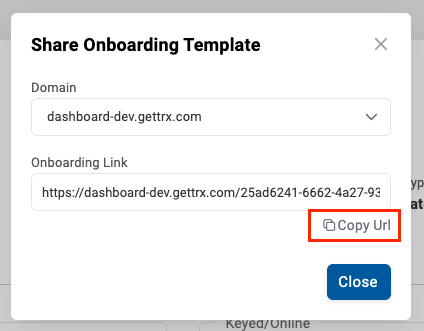
If you have multiple white label branding domains, you can also select under which domain/brand you want to share this template
-
Copy the URL and share it 🙂 by either sending it via email to a prospect, or adding it to a button on your website.
-
Additional Considerations:
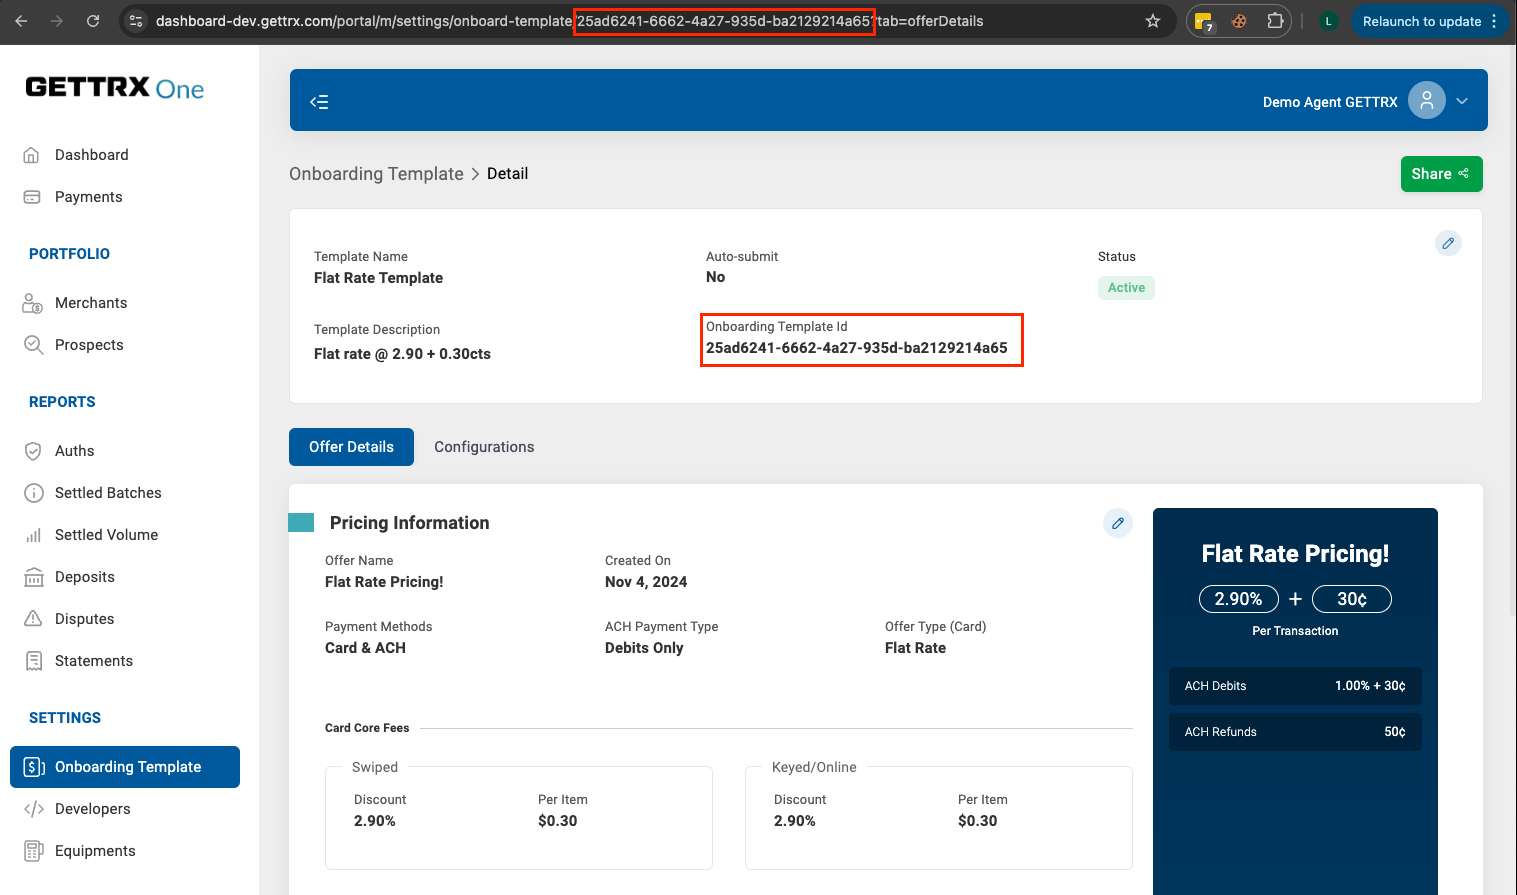
You may need to collect the "Onboarding Template ID" to use it to onboarding templates through our "Create Application" API. The template Id can be found on the onboarding template details UI and URL. See picture below for reference: